In December of 2019, I got an email that our company, Vitrix Health, made it to the top 5 companies at AIMed (the largest AI in Medicine conference in the United States). Just getting into the top 5 was an accomplishment in itself. However, the team at the conference asked me to come to their perennial meeting in Dana Point where I could show our platform to a panel of judges as well as medical practitioners. After a long morning of pitching and demoing, our team was able to snag the first place prize at the conference.
Since the competition, I have been inundated with requests on how we built our algorithm to win this coveted prize. Our team was the youngest by far (we were 23 where the next youngest competitor was 35) so we had an uphill battle to add credibility. This blog post will go over our full process and the decisions that we made when creating our computer vision algorithm. Disclaimer: I don’t want this post to be filled with code as I feel like the thought process is more useful than how it is coded so I will be omitting any specific code blocks. However, when applicable, I will link the resources that I used.
Gathering Data
During my time at the University of Illinois, I had a focus on cryptography and machine learning (most of my elective classes were in these areas). However, that knowledge translated poorly when I started building the Vitrix Health algorithms. In my classes, our class was always given a clean dataset that was uniform in size (usually 24 by 24), relatively homogenous, and with a large amount of training/test images. This meant that we never really had to do things like data preprocessing or data augmentation. We could just use the conv2d function within Pytorch and just build our neural net with no care and get a decent model that was resistant to overfitting. I quickly learned that in the real world this was rarely the case and data collection was a crucial part of the machine learning process.
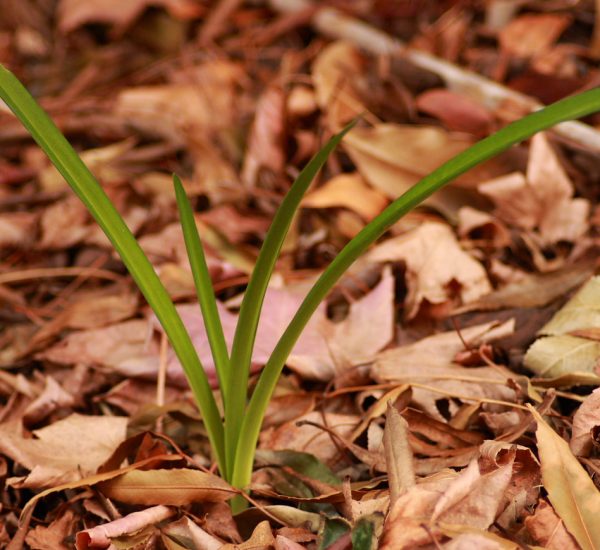
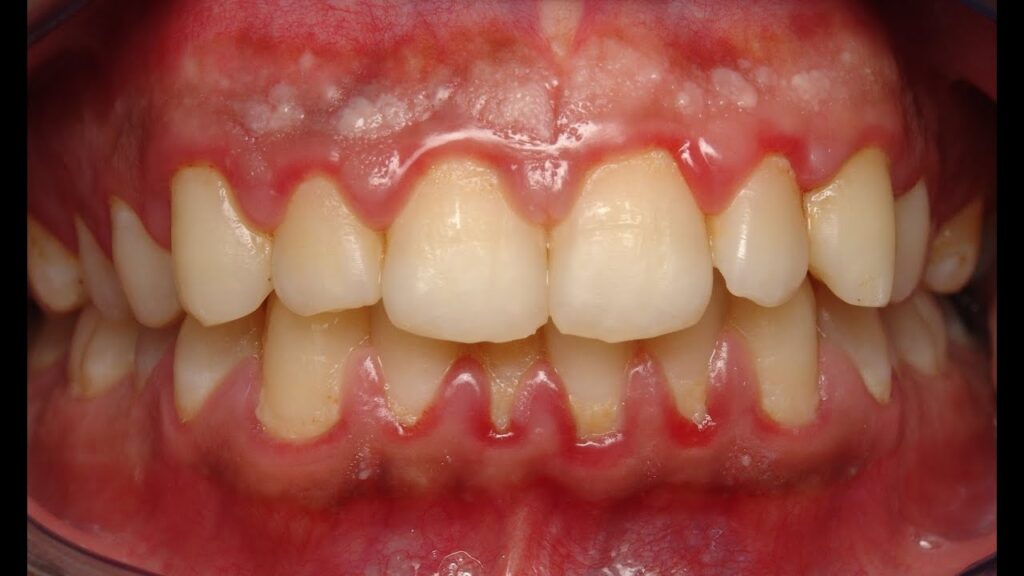
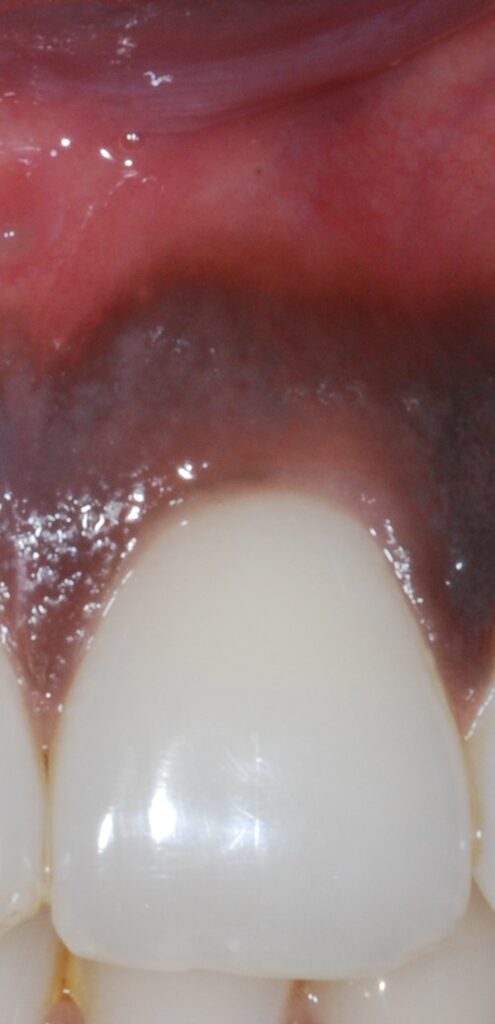
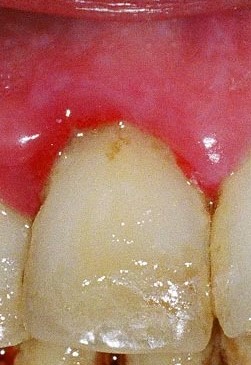
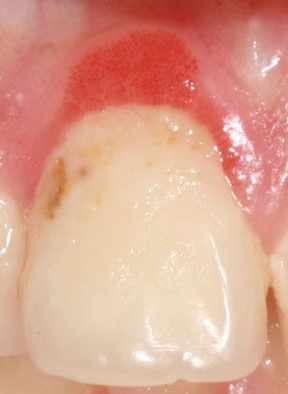
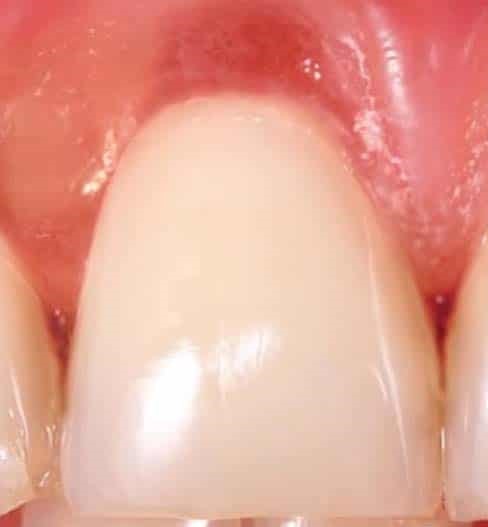
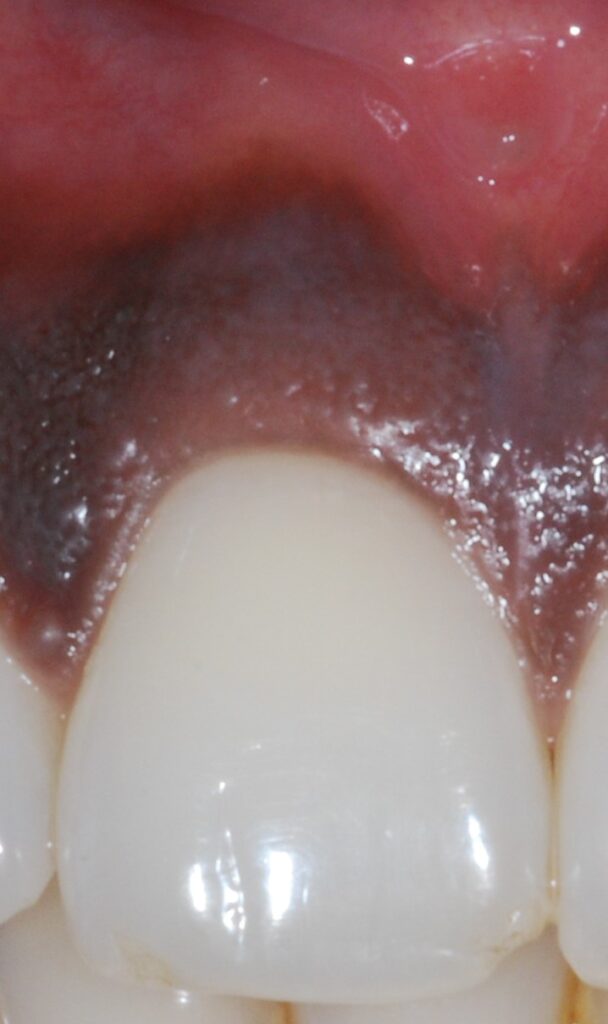
To give a bit of context, at Vitrix Health our goal was to use computer vision to help medical practitioners catch signs of oral diseases earlier in their patients. To further niche down, we decided to try to improve our ability to detect periodontal disease since the disease was prevalent but needed a bite-wing x-ray to diagnose. We wanted to forgo using an x-ray and instead try to use other indicators (like redness and inflammation) to assess the likelihood of the person having gum disease. Getting this data presented our first big roadblock.
Data was the biggest issue when building our model and continues to be in 2020.
Most of the data that existed for gum disease was confined to radiography. Andrew Ng, whose Coursera course is still one of the best out there for machine learning beginners, mentions that a majority of models fail because of the mismatch between training and test images. As we started to reach out to academic institutions for data, we were only given x-rays or images captured on specialized hardware (intraoral cameras). None of these were indicative of the images we were going to get from the phone camera. Given the cost and hurdles of acquiring medical data in the United States, we broadened our search and started partnering with Universities around the world to curate a better dataset.
This process was arduous and we didn’t see the fruits of our labor till about 2 months later when the data started to flow in from these partnerships.
As the data started to come in, we recognized that we forgot to account for the variance in phone quality. In these countries, most people didn’t have iPhones like their North American counterparts. Instead most had Android phones with different makes and models. This gave us wildly different images. Not only were all the photos different sizes and quality but we found that one of our practitioners used a phone that auto-applied a “beauty” filter that was impossible to undo. This meant chucking out a healthy portion of our data set.
Our final hurdle was that there were significantly more unhealthy gum images than there were healthy gum images. This occurred for two reasons. First, the majority of the population in India/Bolivia suffers from gum disease to some degree (especially in the low-cost clinics we were working with). This made finding someone with pristine gums a bit of an oddity. The second was a bias that exists generally in medical data. Normally, an image or x-ray is taken when the patient is suffering from an illness. For example, a physician won’t ask for an x-ray of your lungs if you are healthy. This created an imbalance of medical data available.
In 2020 we are still working through these issues but are more cognizant about the potential roadblocks when we try to work with an institution to build datasets.
Takeaways from data collection
- Make sure your training data is indicative of the data that the model will see when deployed
- If you are curating you’re own dataset, make sure to create a standardized method of data collection
- Think critically about the biases that exist so you can figure out how to mitigate them in the future
Pre Neural Net
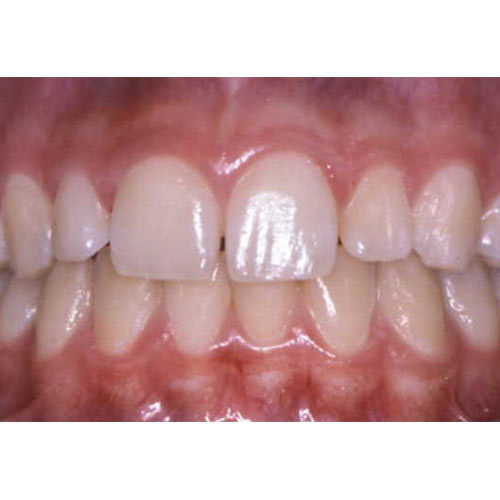
I normally joke around that most people try to use CNNs for their data because it rings better with investors. When you can claim that you are “AI-Driven”, investment tends to come easier. However, for many datasets this approach is overkill. Before I started putting effort into training a complex model, I reached out to oral health experts to find out how they identify someone with gum disease. Other than using radiographs and other specialized tools, most told me that they look for 2 things: redness of the gums near teeth and general inflammation. In my mind, this is a great place to start so you can try to mimic this behavior by performing feature extraction. If you don’t know what feature extraction is, below is a great definition of it:
Feature extraction is a core component of the computer vision pipeline. In fact, the entire deep learning model works around the idea of extracting useful features which clearly define the objects in the image.
Manning Publications
So we know from the gum images we needed to extract those features if we can. While extracting inflammation data is difficult, we can easily isolate the redness in the gums by focusing on the different color channels within the image. Let’s see this process below.


After this, we ran our outputs past experts who felt the green channel provided more meaningful information about the state of the patient’s gums than the red channel. With the green channel, we can see the contrast that occurs around the gum line that shows the affected areas. We performed this split on all our images then fed them into a Random Forrest Classifier.
With this model we were able to get an accuracy of ~74%.
The problem with this approach was the high number of false positives (ie. we labeled it as unhealthy but it was actually healthy). Our goal from the beginning was to minimize this number so our Random Forrest Classifier wasn’t a great method. After trying other ensemble methods, we realized that all our attempts were plateauing at around 75% accuracy. We needed something more robust and thus moved to CNNs.
Our first stab at CNNs
The next series of decisions shows how naive I was (and still am) when it comes to machine learning. Our mistakes often teach us more than our successes and we learned a very expensive mistake during this leg of our journey.
During my undergraduate studies, I was always reading about new models that were coming out (for example I was all about Squeezenet when I first heard about it my junior year) and I felt that Vitrix Health should also come up with its own architecture. That way we could publish some cool papers and get some organic marketing for the company. This sent me down a deep rabbit hole where most of my time was spent reading research papers that honestly added little value to the problem we were trying to solve. Trying to understand the difference in using Adam over SGD for my optimization function created diminishing returns for the model I was training. Being caught up in these semantic differences caused us to learn a very expensive lesson because we wasted time in analysis paralysis rather than building.
To take a quick step back, during this time our team relocated to Shenzhen, China. All we had on our desks were the laptops we came with. Training models are computationally expensive and, for the first time, we didn’t have a PC with a dedicated GPU to train on. Being in the mecca of hardware, we decided to hit up TaoBao (the Chinese Amazon) to try to build a PC but realized that there were too many unseemly characters selling graphic cards on there that we ended up not going down this route. In hindsight, this was a good move because our datasets became too big to run on a singular card and we moved to use GPU instances on AWS.
When we started training our models on these cloud instances, our AWS bill started to rack up. We were given AWS credits from Amazon by being a part of the HAX accelerator so we thought we were safe but in reality, we were far from it due to my ignorance.
We were constantly training new models after tuning hyper-parameters, adding new layers, or doing some data augmentation. After each iteration, we would look at our training error, validation error, etc, and found our model to be performing poorly. By this point, we had blown through our credits without making any meaningful progress. Our model never once cracked 70% accuracy.
I decided we had hit a wall and reached out to other computer vision experts who have been through this process. What followed was a series of long Zoom meetings where we all looked at our current dataset and ideated on how to boost our model. This led to me learning more than I ever had before and creating the model that we used during our AIMed presentation.
The winning model
In practice, very few people train an entire Convolutional Network from scratch (with random initialization), because it is relatively rare to have a dataset of sufficient size. Instead, it is common to pretrain a ConvNet on a very large dataset (e.g. ImageNet, which contains 1.2 million images with 1000 categories), and then use the ConvNet either as an initialization or a fixed feature extractor for the task of interest.
CS231Notes
I was sent an article that had this quote in it. After reading more notes, I truly felt like an idiot. For the last 4 months, I was hoping that creating a model from scratch was the way but I found that, with our small dataset, this is the worst method we could’ve picked. We quickly devised a better method after speaking with our advisors. We broke down our method into 5 steps so we could understand how each part was working towards of goal of detecting oral diseases.
Step 1: Isolate the tooth
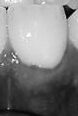
We realized that there was a lot going on in the images we got. At our core, we wanted to check the state of the gum-line near the top of the teeth. To do this we needed to first pass our image into an OpenCV algorithm to isolate the teeth and create a 32×32 image to feed into our CNN (we ended up using LeNet ).
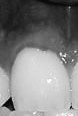
We initially used Thresholding to find the edges of the teeth and create a box around the center of the teeth. However, this just did not work since the edges of the teeth would overlap. We can see this behavior in the image below which is the output of the thresholding.

No amount of smoothing would fix this and we needed to fundamentally change how we were finding the teeth. This led me to implement the Watershed method to isolate each teeth. This process is quite complicated and I do not know how this algorithm works in its entirety but I know this lets us build a color intensity map that lets the program create a more informed decision on how many discrete objects are in the image. This created much better outcomes for us (the resulting images are below).
Step 2: Create LeNet in Pytorch
LeNet was an architecture that I had used with MNIST early on in college and so it always resonated with me as being a beginner friendly model that can be quite robust. However, we have to create this model in Pytorch which was my first task.
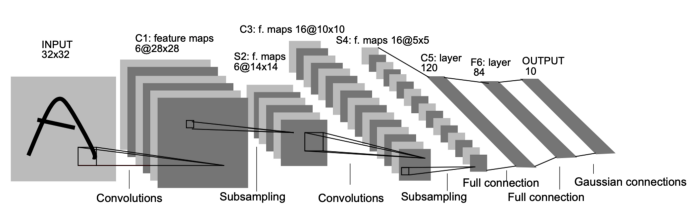
The architecture of the model is shown above. I essentially implemented this from the original paper with a few changes. The first was changing the activation function. The original paper uses Tanh as its activation function but I chose to use the ReLU function instead. I don’t know how much of an impact this decision had but I had always used ReLU and it felt weird not using it. The final change was changing LeNet to have a Binary output since we want its output to be 2 responses: healthy or unhealthy. Most of those changes were altering the final FC Layer to have the right connections and outputs.
Step 3: Data Augmentation
We did some of this in step 1 but I was told to avoid over-fitting we should be doing some more intense data augmentation to create a robust dataset. This involved using the torchvision.transforms.RandomApply function to create a random set of horizontal flips, etc. This process increased our overall dataset by 2x but also helped create a dataset that was resistive to overfitting.
Step 4: Train the model
Our final step was to train the LeNet model on the dataset we curated. This was the least difficult step in the process since it just required me to run the code and wait. I could mention the different hyperparameters we used but we were far more efficient with our process this time around so we didn’t have to do too many iterations with different values. The loss function from our process is below (I decided to only show the first 100 epochs but we ended up running this for about 1000 epochs):
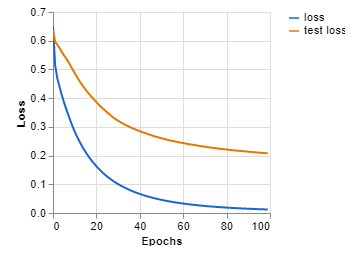
As you can see this looks much better. Our new accuracy with this model was 82%.
Step 5: Output results
For this final step, I had to put on my product manager hat. Once we knew which photos were categorized as unhealthy, we wanted to go back to the original image and mark the areas where there was increased redness. We did this by relating the cropped tooth image back to its original photo and creating a box around the inflicted areas. The output image from our process is below.

I think this part is often overlooked (and why I think we ended up winning). Most engineers tend to simply throw the output data out to the end-user without any real thought. The other companies we were competing against created some of the nicest looking graphs for medical practitioners to interpret. However, these practitioners rarely have the time to analyze these outputs. We spent a large portion of our time testing our outputs with physicians to ensure they could get a clear understanding of their patient’s oral health in the shortest amount of time.
Overall Takeaways
This post has already gotten quite long but I wanted to end it out with some takeaways.
- Data is king. Make sure you’re collecting clear and concise data that is indicative of what the model will see in the wild. This will make training easier and your model more useful when deployed.
- Don’t jump to using CNNs right off the bat. There might be a better method with feature extraction that allows you to get great results without incurring the heavy resource drain that a CNN would create.
- When picking a model, unless you have a large dataset with a lot of time/money, look at existing architectures and applying transfer learning or finetuning.
- Make sure you apply some semblance of data augmentation to prevent overfitting. If you are making your own architecture, you can add in some pooling layers to help with this.
- Check with your end-user that your model’s outputs are understandable. This is an iterative process so make sure you keep some beta testers in the loop as you make changes.
All the above was the 1 year of development thrown into a post. I don’t claim to be a machine learning expert (trust me I am far from it) but I was thrown into the deep end being the only developer on our team with some experience. I’m sure that our winning model has a fair share of issues and ways we can optimize it more but the state that its in currently, the model just requires more data to become more accurate.
If you have any thoughts or are another enthusiast in the AI in medicine space, I’d love to hear from you! Shoot me an email at me@ayushkumar.xyz and I’ll be sure to respond.